Tuesday, February 14, 2017

Pineapple Upside Down Baked Oatmeal

Pineapple upside down cake is a pure joy of mine, the best I've ever had was in Maui, it was topped with macadamia nut ice cream and caramelized sugar. Yum. This is my healthy nod to a decadent delicious dessert.

This recipe is recipe is vegan and dairy free, if using gluten free oats it will be gluten free.  Feel free to substitute this recipe to your needs, sugar can be replace with Splenda or sweetener of choice, maple is a nice touch. Bake in a 8×8 cake pan or 6 ramekins using this recipe or double this using a larger cake pan or add more ramekins.

Main ingredients:
  • 2 cups quick cooking oatmeal*
  • 1/2 cup sugar
  • 1/4 teaspoon salt
  • 2 1/3 cups almond milk, unsweetened vanilla
  • 2 tablespoons ground flax seed
  • 4-5 tablespoons water
  • 1 teaspoon vanilla
  • 1 teaspoon rum
  • 1/4 cup butter substitute, melted
  • 1 can Pineapple slices, 1 cup of juice reserved
  • 4 - 6 Maraschino Cherries
  • 1/4 cup brown sugar
  1. Preheat oven to 350°F.
  2. In a small bowl combine flax seed and water, stir and set aside.
  3. In a large bowl add oatmeal, sugar, pineapple juice, salt, almond milk, flax seed mixture, rum, and vanilla. Mix together using whisk.
  4. Place a spoonful of butter in the bottoms of each ramekin or all the butter in the cake pan, followed by an even sprinkling brown sugar, a pineapple slice, and finally place a cherry in the center of the pineapple.
  5. Ladle or pour oatmeal mixture into baking pan of choice.  If using full ramekins I highly suggest a parchment lined baking sheet to catch any drips or spills.
  6. Bake 350°F 40 to 45 minutes. Remove oatmeal from oven, the tops oatmeal should be lightly browned and raised uniformly.
  7.  Allow to cool for at least 2 hours before digging in.  Using a knife loosen the side of the ramekin or cake pan. Place a plate on top of ramekin or cake pan, flip plate over and lift off pan.   Enjoy!


To make this non vegan, replace the flax seed and water with 2 eggs.

*Steel cut oats or old fashioned oats may be used, just use 2 1/4 cups instead of quick cooking oats

Sunday, February 12, 2017

Dark Chocolate Coconut Milk Caramels

I am in charge of buying candy when holidays come around, this is a nice perk for my husband, Steve, he is able to worry less about buying something that it turns out I cannot have.  This happened a few years ago, he bought what was a loving and thoughtful gift of candy, only to find out it made me ill, not all dark chocolates are dairy free. 

This recipe is what happens when your favorite caramels are $60 per 36 pieces, which isn't a horrible price, we have purchased these at least 4 times, they are really good. I just know that if I take the time, about 4 hours, I can make triple the amount for around $10. These freeze well, feel free to hide them in your freezer. If I can keep my paws off them, I have candy for holidays for the rest of the year.


Ingredients:
  • 27.32oz of full fat coconut milk, two 13.66oz cans
  • 2 1/4 cups of granulated sugar
  • 1 cup maple syrup
  • 3/4 cup water
  • 1/8 teaspoon salt
  • 1 teaspoon Vanilla 
  • 8 - 10 oz dark chocolate, 85% cacao 
  • Sea Salt
Directions:
  1. Place a large sheet of parchment paper a 9x13 cake pan.
  2. In a wide and tall pot attach candy thermometer, hovering off the bottom of the pan, my thermometer has a metal piece the keeps the thermometer off the bottom, super handy. I used a stock pot and it was more than big enough for this, if your pot is too small during cooking, turn off heat, use a larger pot, carefully moving contents to their new home.
  3. Add coconut milk, sugar, maple syrup, water, and salt to pan.  Turn heat to medium high. With a long handled wooden spoon, stir mixture gently, combining ingredients.  The coconut milk fat will look like floating icebergs, once they melt it will look like watered down hot chocolate.
  4. Stir occasionally to ensure the mixture is not burning to the bottom of the pan, boil until temperature reaches 240°F.  My batch took 25 minutes to get to 220°F, and another 5 minutes to get to 240°F.  During this time it changed from watery to thicker and more of a caramel color, this is when I feared burning candy on the bottom of the pan the most. You may even get small whiffs of burning caramel smell, I did, I was worried I had ruined my batch - not so - everything turned out fine.
  5. Wait a few seconds, maybe 20 - 30 after 240°F before removing from heat, just don't let the mixture get too much hotter, try to stay under 245°F. I like a chewy caramel this kept these chewy and not super soft. I gave a good quick stir then turned off heat. 
  6. Add vanilla, stirring to combine.  It will sizzle and smell wonderful.
  7. Using a silicone spatula, quickly and carefully pour contents of pan into parchment lined cake pan. The caramels set rather quickly, if you take too long to scrape the pan out the caramels may have a discolored look and won't be uniform, I left the bulk of the pan scraping as bonus candies, I'll come back to that.
  8. With the caramels in the cake pan cooling, gently level the pan out by slowly helping the caramels settle.  Set to cool somewhere on a kitchen towel - I left to cool on my counter but wanted to protect my counter from the residual heat. 
  9. Let cool for at least 3 hours, pick up caramels using the parchment paper.  With a kitchen knife or shears cut caramels to size, I used both methods.  The blades will get coated with sugar and will dull, be ready to clean and dry blades.
  10. In a ramekin, small Corning Wear baker or Pyrex glass bowl, add half of the chocolate bars.  Heat in microwave in 30 second intervals until melted, about 3 minutes.
  11. Lay wax paper on a baking sheet that will fit in your fridge.
  12. Using a fork drop one caramel at a time into the chocolate, flip to coat. While coated caramel is on fork, tap the inside of the chocolate bowl to gently ease off extra chocolate coating.  Then slide chocolate covered caramel on to wax paper to cool. 
  13. Before chocolate sets add dusting of sea salt.  I would coat 3 - 5 pieces with chocolate then sea salt that small group.
  14. Heat more chocolate as needed.
  15. When the baking sheet is full, move to fridge to speed up chocolate setting. Lay out another sheet of waxed paper to continue chocolate coating; I needed two for this recipe.
  16. Once chocolate coating is set, about 10 minutes in fridge, gently remove from waxed paper and store in container of choice.
  17. I wrapped two groups of candies in freezer paper to keep in freezer for another time.  Chocolates have a 10 - 12 month freezer self life, just let them warm up at room temperature for a few hours before digging in.  
    It takes a long time to boil down - 30 minutes of gently stirring until I got to 240°F
    Salted and chewy caramels

    Happy Valentines Day!
Recipe adapted from: Every day vegan cooking

Tuesday, February 7, 2017

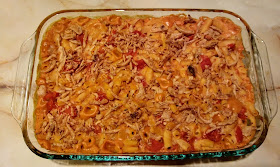
Creamy Macaroni and Pumpkin

Macaroni and cheese is a favorite of mine, this has zero dairy, zero nutritional yeast, just seasoned pumpkin and pasta.  Truly creamy and flavorful. Printable recipe here
  • 1 15oz can pumpkin puree
  • 16 oz macaroni
  • 14.5 oz diced tomatoes seasoning of choice, juice reserved
  • 2 cups almond milk
  • 2/3 - 1 cup of wine
  • 2 chicken bouillon cubes, I use Not Chik'n
  • 2 Tbs flax seed meal
  • 1 Tbs dried green onion
  • 1 tsp dried sage
  • Salt and pepper to taste
  • French fried onion rings
  • 1 tsp dijon mustard
  1. Preheat oven to 350°F.
  2. Cook pasta per package directions.
  3. In a large pan combine; pumpkin puree, chicken bouillon, almond milk, flax seed meal, onion, sage, and dijon mustard. 
  4. In a liquid measuring cup collect tomato juice, fill measuring cup to the one cup amount with wine. Then pour in with other ingredients.
  5. Heat ingredients on medium heat until simmering, stirring occasionally. Once fully heated, turn off heat.
  6. When pasta is finished cooking, drain then mix into sauce pan. Dunk the macaroni into the sauce, I try to make sure the pasta soaks in the macaroni tubes.
  7. Pour into a baking dish, also mix in tomatoes. Sprinkle fried onions over top 
  8. Bake 20 minutes until bubbly and fried onions start browning.


Sunday, February 5, 2017

Cheesecake Baked Oatmeal

I make a lot of baked oatmeal desserts, it is my favorite way to have cake and eat it too.  Oatmeal is a versatile grain that all too often is overlooked and left to be boring, no longer.

When I first tackled this recipe, I celebrated. It is truly a healthy cheesecake and I don't use healthy loosely, there isn't any dairy or any oil. In fact it is full of fiber and omega 3s by using flax seed meal.

This recipe is recipe is vegan and dairy free, if using gluten free oats it will be gluten free.  You may bake in a 8×8 or 6 ramekins using this recipe or double this using a larger cake pan or add more ramekins. Printable recipe here.

Main ingredients:
  • 2 cups quick cooking oatmeal*
  • 1/2 cup sugar
  • 1/4 teaspoon salt
  • 3 1/3 cups almond milk, unsweetened vanilla
  • 2 tablespoons ground flax seed
  • 4-5 tablespoons water
  • 3 tablespoons apple cider vinegar
  • 2 teaspoons vanilla
  • Juice and zest of one small lime
Topping:
  • 2/3 cup of Tofutti Sour Supreme
  • 1/3 cup sugar
  • 1/2 teaspoon vanilla
  • 1/4 cup vanilla unsweetened almond milk
  1. Preheat oven to 350°F.
  2. Lightly oil baking dish of choice.
  3. In a small bowl combine flax seed and water, stir and set aside.
  4. In a large bowl add oatmeal, sugar, lime zest, lime juice, salt, almond milk, flax seed mixture, and vanilla. Mix together using whisk.
  5. Ladle or pour into baking pan of choice.  If using full ramekins I highly suggest a parchment lined baking sheet to catch any drips or spills.
  6. Bake 350°F 40 to 45 minutes.
  7. While oatmeal is baking, in a small bowl combine Tofutti, sugar, almond milk, and vanilla. This topping will be runny, no worries, it should be.  
  8. Remove oatmeal from oven, the tops oatmeal should be lightly browned and raised uniformly. Spoon topping on oatmeal, return to oven and bake for 10 minutes, the topping will be bubbly.
  9.  Allow to cool then cover and refrigerate for at least 4 hours, overnight if you can hold out, before digging in. The topping will be less runny the longer it sets, it will be a creamy topping. Enjoy!

To make this non vegan, replace the flax seed and water with 2 eggs.

*Steel cut oats or old fashioned oats may be used, just use 2 1/4 cups instead of quick cooking oats.


Saturday, February 4, 2017

Cashew Cream Cheese

I am still amazed that cashews can replace my beloved cream cheese, but  it happened. This recipe is hands off time heavy, 24 hours just to soak the cashews, maybe 10 minutes hands on time followed by another 8 or more hours straining.  This is totally worth the time though, tangy, creamy, and delicious.  Printable recipe here.
  • 2 cups cashews soaked 24 hours
  • 1 packet True Lemon crystallized lemon
  • 3 - 4 tablespoons apple cider vinegar
  • Tablespoons of water as needed
  • 1 teaspoon agar agar powder
  • 1/4 - 1/2 teaspoon salt
  • 1 - 2 teaspoons dried chives or green onion, optional
  1. Set cashew in a medium size bowl, cover with cold water. Let stand for 24 hours.
  2. In a colander drain cashews.
  3. Place cashews in food processor or blender; add lemon, vinegar, agar agar powder, salt to taste, and water as needed. Process until smooth, 5 or so minutes.
  4. Use cheese cloth or a coffee filter metal sieve over a bowl to remove excess water. 
  5. Feel free to use plain or any additions you would like, I added dried green onions. 

Adapted from Healthful Pursuit 


 Setting up the coffee filters for straining

Fine mesh sieve over bowl

Coffee filters pulled together and tied closed

Coffee filter ball tied to wooden spoon and left to drain 


Thursday, February 2, 2017

Tiramisu Baked Oatmeal

This is baked oatmeal like custard with a delicious twist, tiramisu.  Move over lady fingers and heavy cream, this recipe is egg free and dairy free.

You may bake in an 8×8 or 4 - 6 ramekins using this recipe or double this using a larger cake pan or add more ramekins.  Printable recipe here.

Main ingredients:
  • 2 cups quick cooking oatmeal*
  • 1/3 cup sugar or 1/2
  • 1/4 teaspoon salt
  • 1 1/3 cups almond milk, unsweetened vanilla
  • 2 cups strong coffee
  • 2 tablespoons ground flax seed
  • 4-5 tablespoons water
  • 2 teaspoons vanilla
  • 3 tablespoons canola oil
Topping:
  • 1 can coconut milk 14 oz
  • 1/2 cup powdered sugar
  • 1 teaspoon vanilla
  • 2 tablespoons corn starch
  • 3 tablespoons cocoa powder
  • 1 tablespoon dark chocolate shavings*
  1. Preheat oven to 350°F.
  2. Lightly oil baking dish of choice.
  3. In a small bowl combine flax seed and water, stir and set aside. 
  4. In a large bowl add oatmeal, sugar, salt, strong coffee, almond milk, flax seed mixture, oil, and vanilla. Mix together using whisk.
  5. Ladle or pour into baking pan of choice.  If using full ramekins I highly suggest a parchment lined baking sheet to catch any drips or spills.
  6. Bake 350°F 40 to 45 minutes.
  7. Remove oatmeal from oven, the tops oatmeal should be bubbly and raised uniformly. 
  8. In a mixing bowl whip coconut cream, powdered sugar, vanilla, corn starch, coconut milk, cover and refrigerate. Topping will be runny and will firm up some in refrigerator. See note in next step if you have some time.
  9.  Allow to cool completely before adding topping, it will melt.  Once topping is on cover sift cocoa on top and add additional dark chocolate shavings.  *Use a vegetable peeler on a candy bar to make flakes.  I like to let the whipped topping set in, feel free to dig in or give the tiramisu time to develop flavor by adding just the whipped topping wrapping with plastic wrap and keeping in refrigerator for 4 - 6 hours. When ready to serve, set out 10 minutes to warm up a bit and then add chocolate powder and chocolate shavings.
  10. Enjoy!
Easily use eggs in this recipe by substituting flax seed meal and 4-5 tablespoons of water for two eggs.

*Steel cut oats or old fashioned oats may be used, just use 2 1/4 cups instead of quick cooking oats.

If you can have dairy feel free to use milk and butter.